Photoshop Basics, Experimenting with Fun!
Photoshop is probably one of the best ways to experiment with technology and have some fun; you are always learning something new, creating exciting things and this program can be used for a variety of projects from school work, to
graphic organizers for lesson plans, advertisements and posters, fun photo-gifts
for friends and the list is ongoing.
Getting Started!
1. Using Photoshop CS5, at the top of the page there will be the following separated links: File, Edit, Image, Layer, Select, Filter, Analysis, 3D, View, Window and Help.
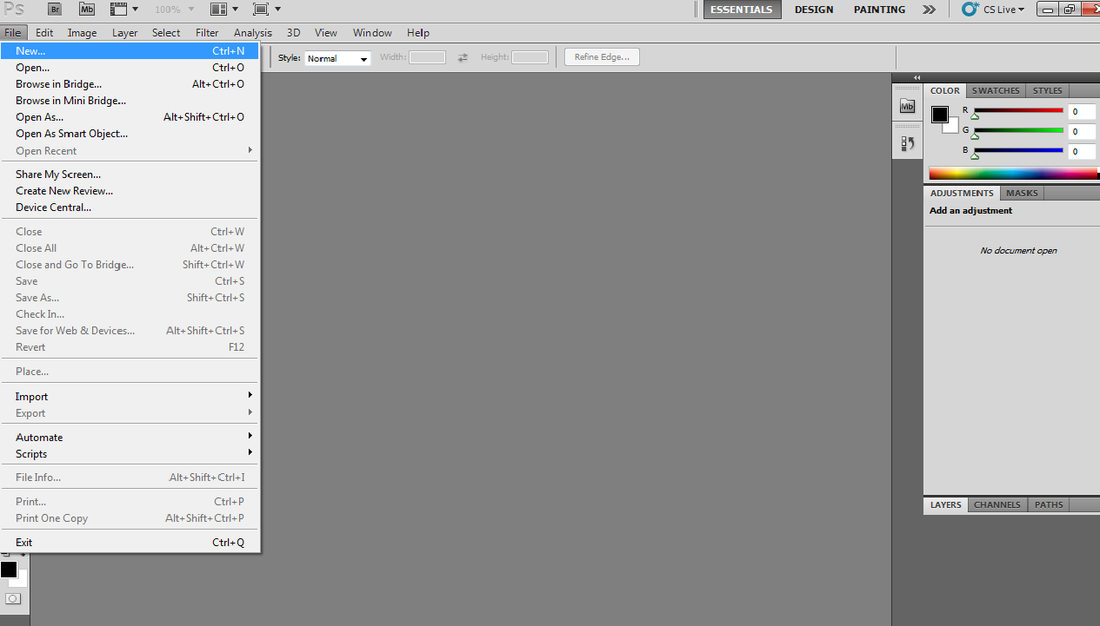
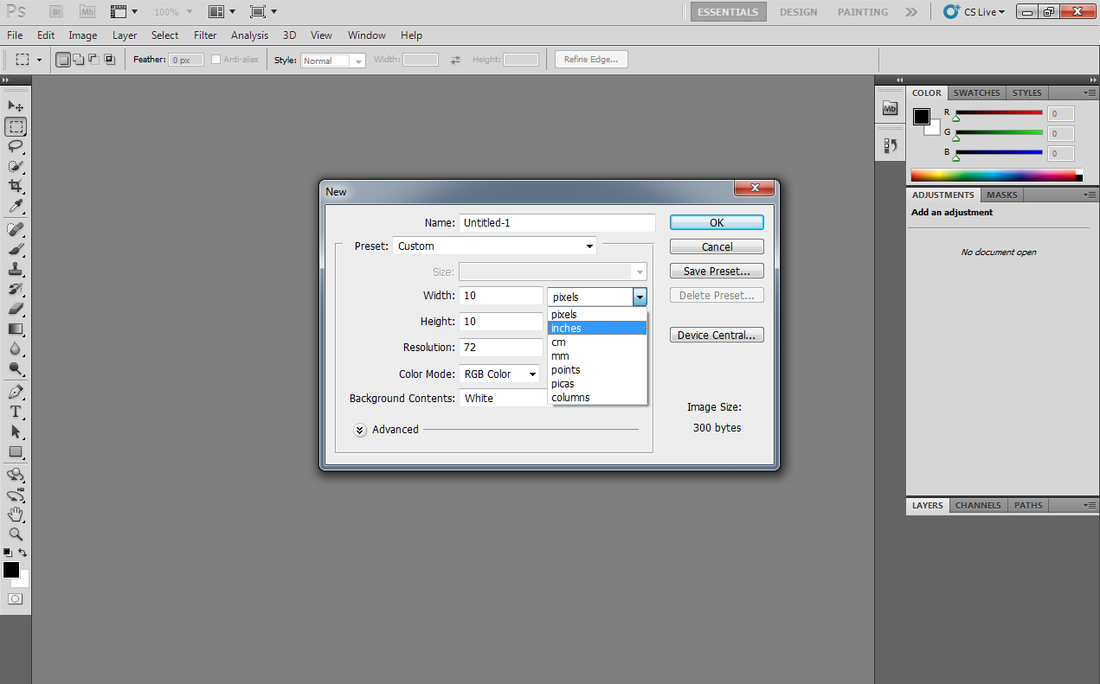
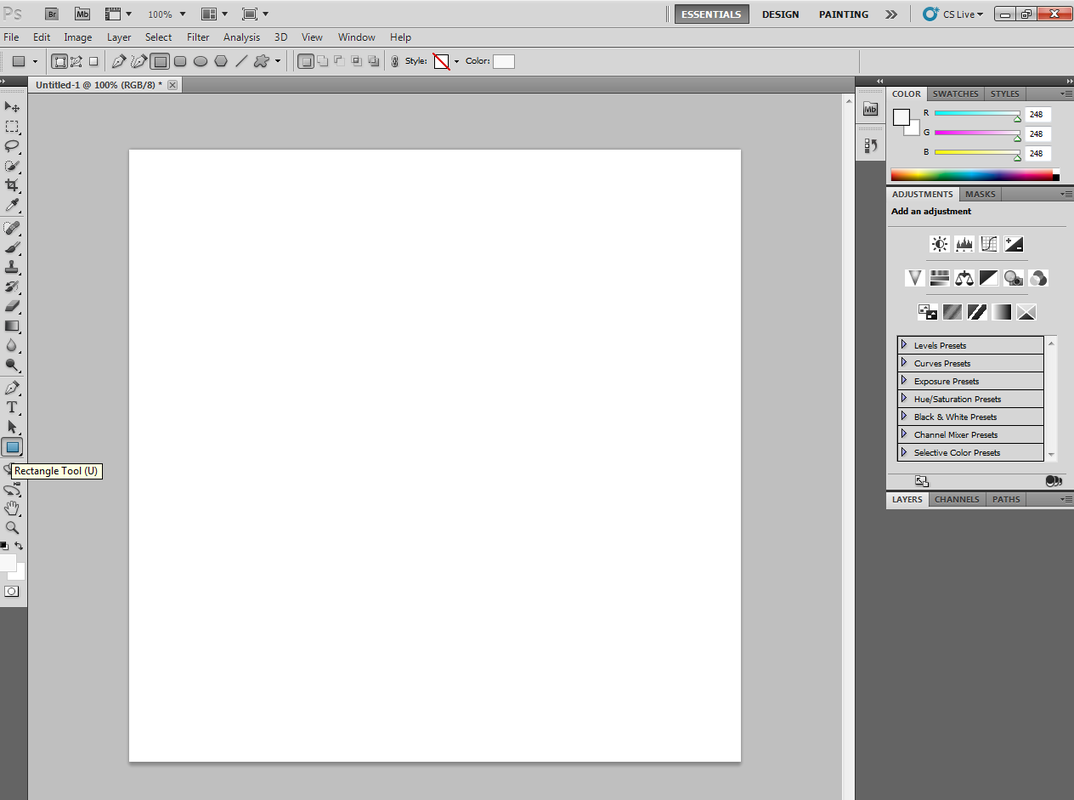
2. The first thing you will do is click on FILE, and select NEW. A box will appear showing different dimensions. From here, you will choose the dimensions of your product. When you have decided on your size, click OK, and a blank template will appear on your screen.
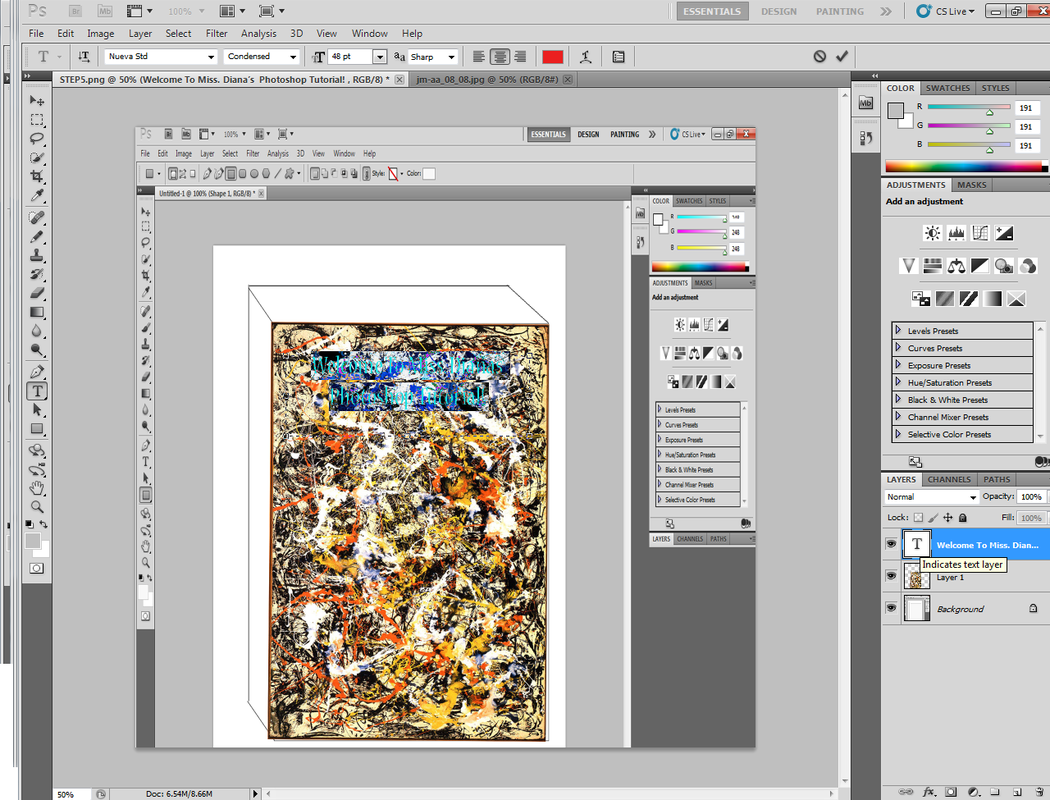
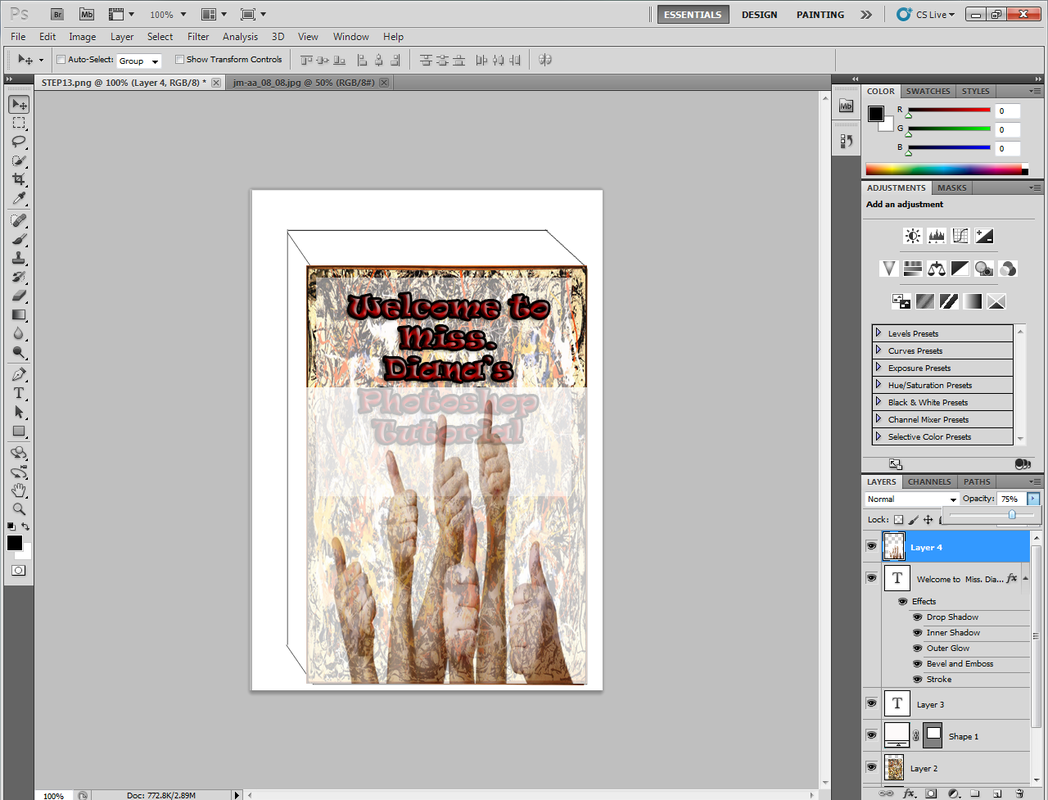
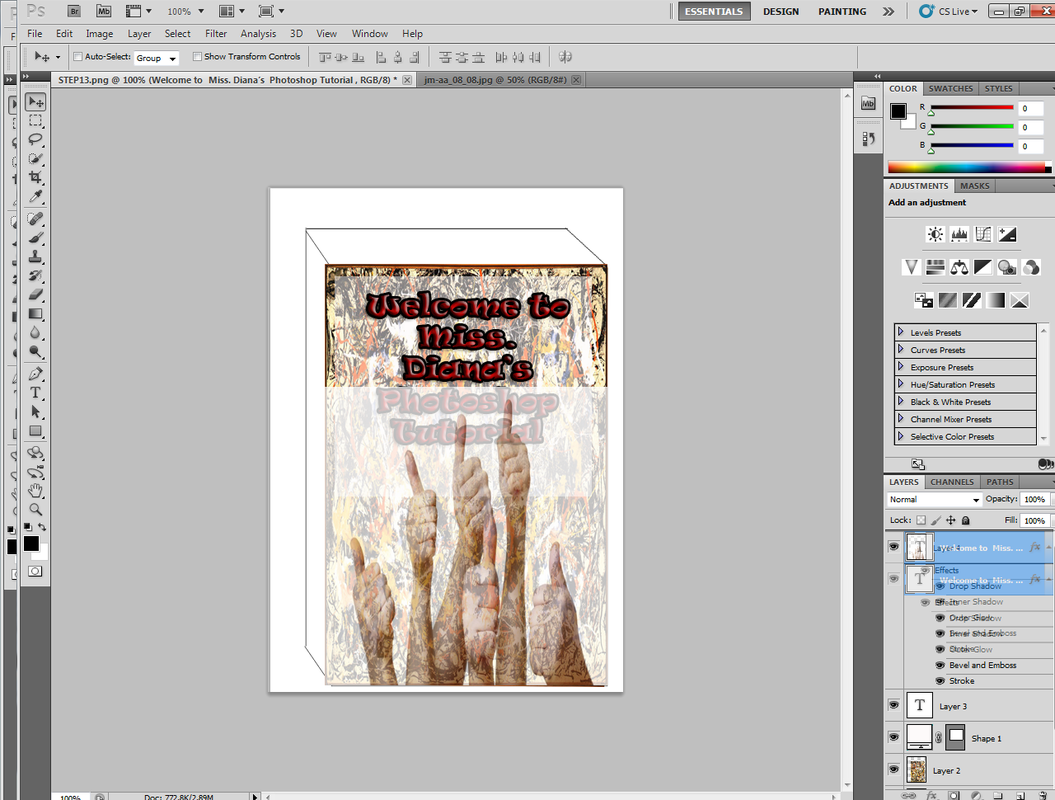
3. Keep track of the box on the right hand side of your screen. This box will detail all the information, and layers you have created in a step-by-step visual representation of what you have been working on. This box will allow you to make small edits to you work, delete any layers you don't want and improve as you go.
|
|

|
|
|
Creating A 3-Dimensional Image:

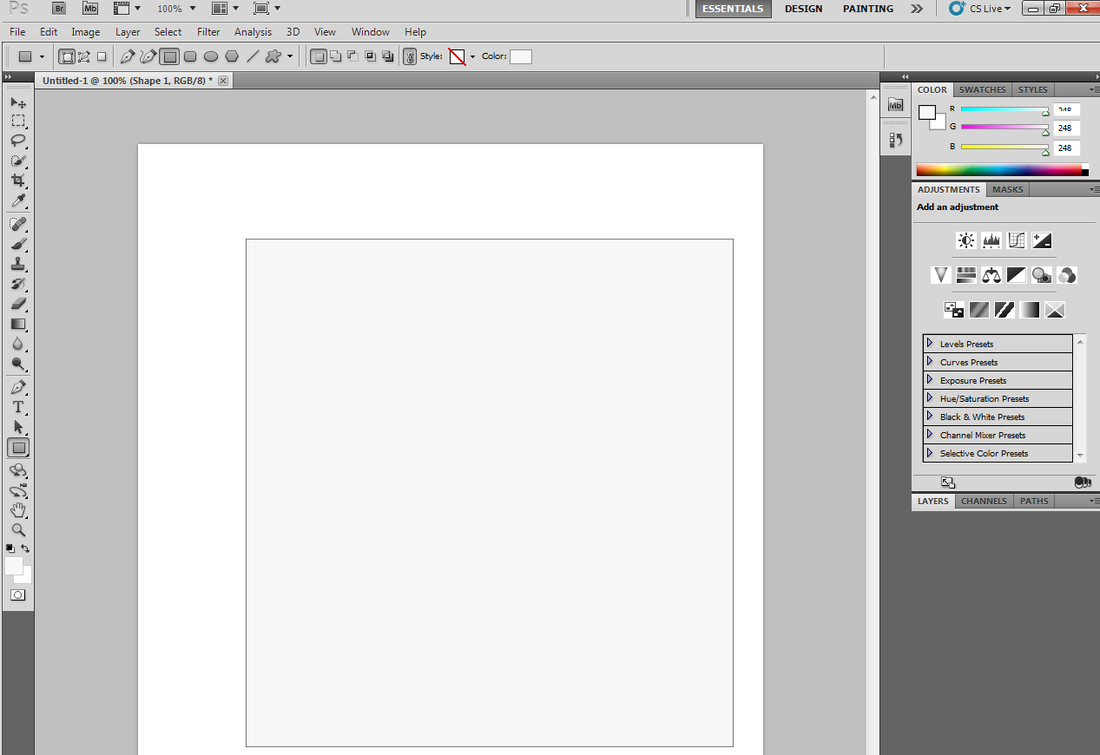
4. Now if you need to create a 3-Dimensional Product, you may you the 3D option of the seperated links, or create the size of proportions you want yourself using the SHAPE tool on the side of your work.
How To Add Text:
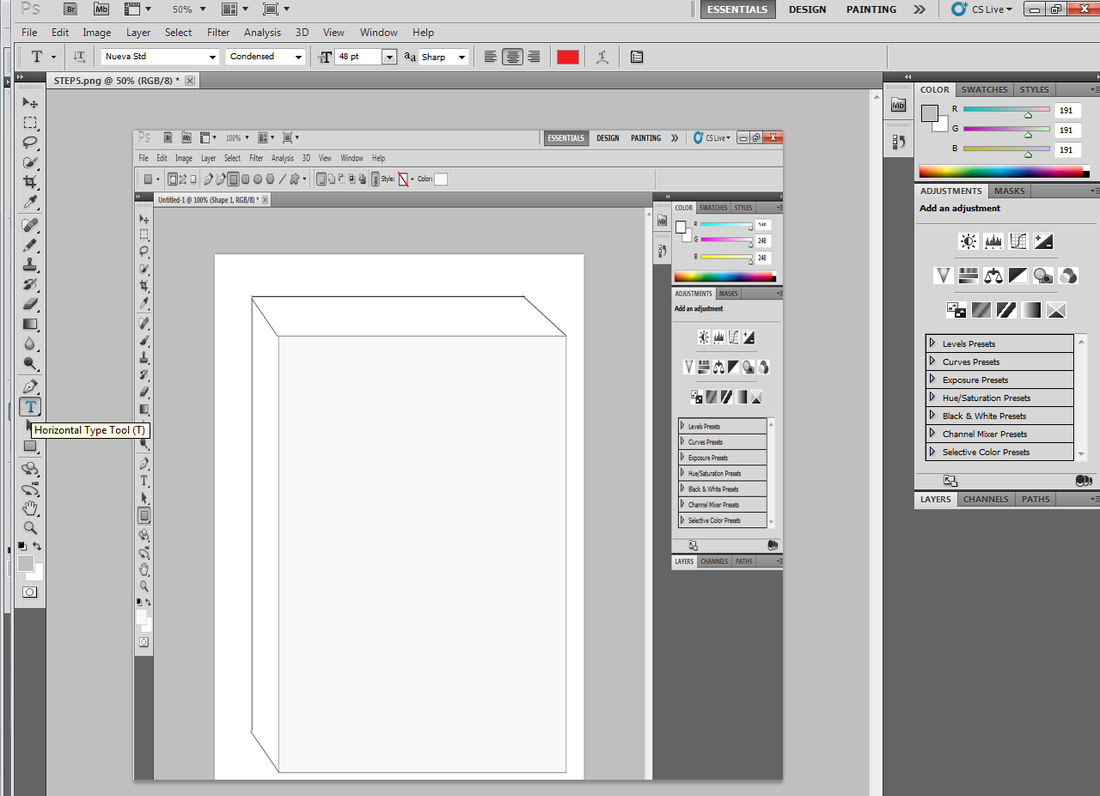
5.To add text you will click on the text tool, where you will draw a dotted shape on your template where the information will be placed. |
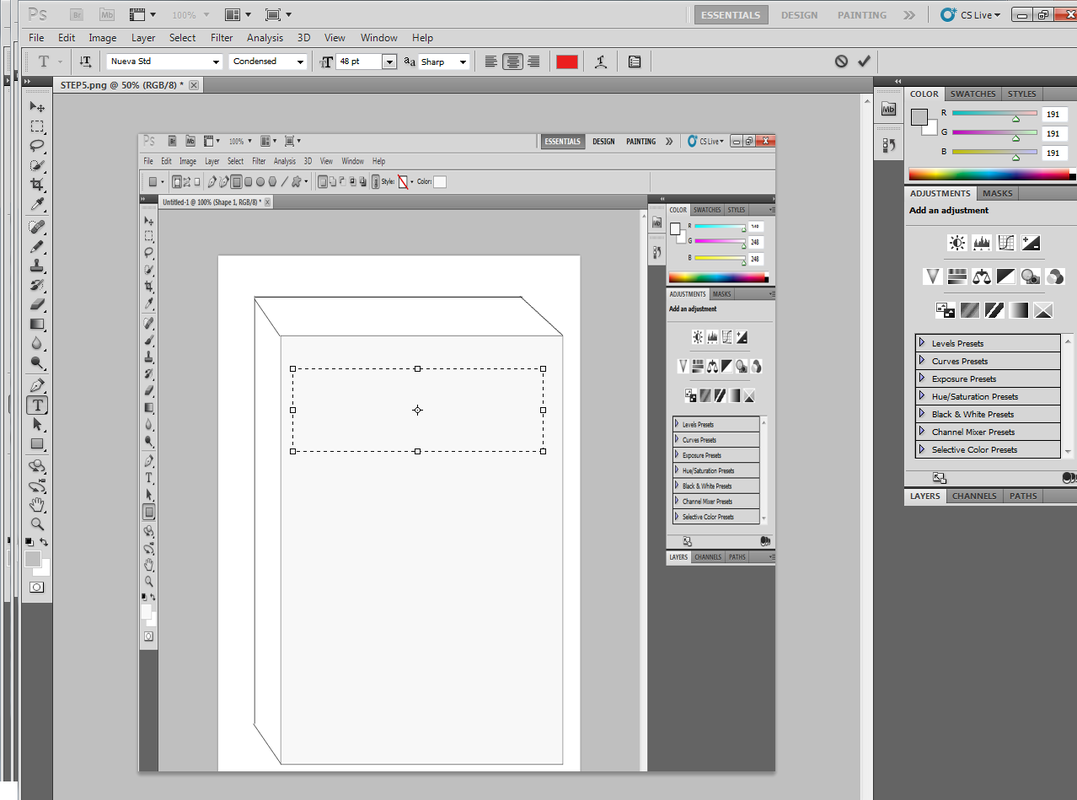
6. Begin typing your text into the text box you have just
|
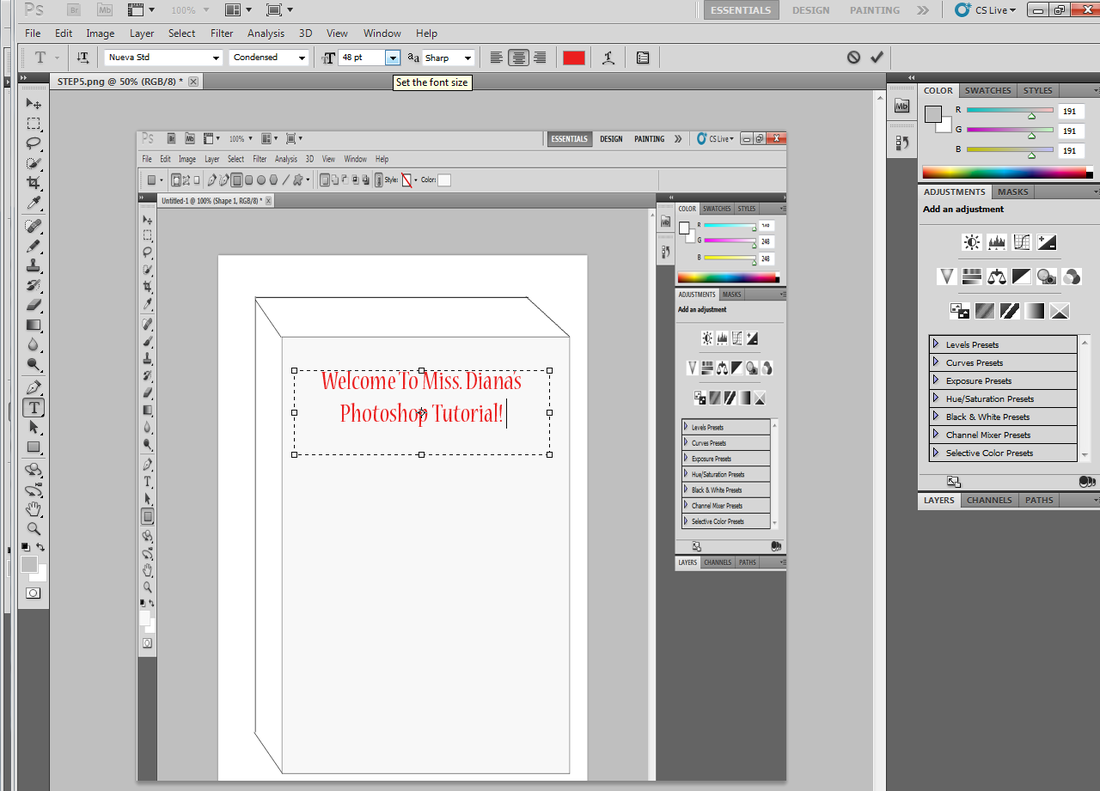
7. To change the colour, type of font and size, simply go back to the top of your
|
Now Let's Layer Images!
|
8. Whether you are taking your own photographs, or finding
|
|
Making Simple Image Edits, Resizing and Transforming:
|
|
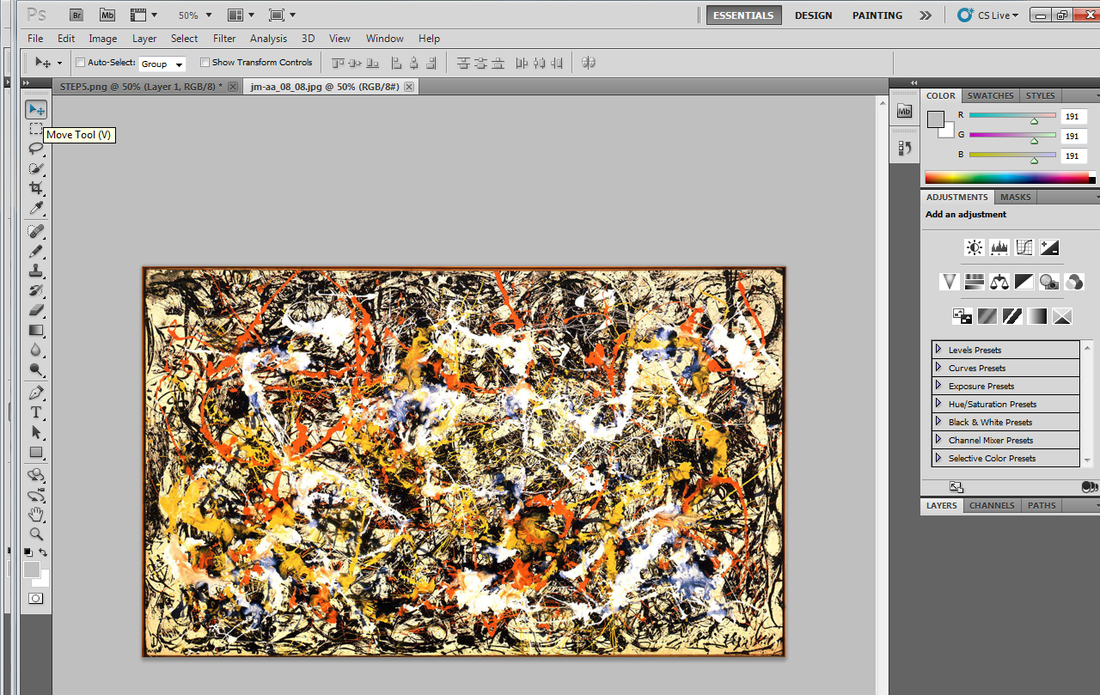
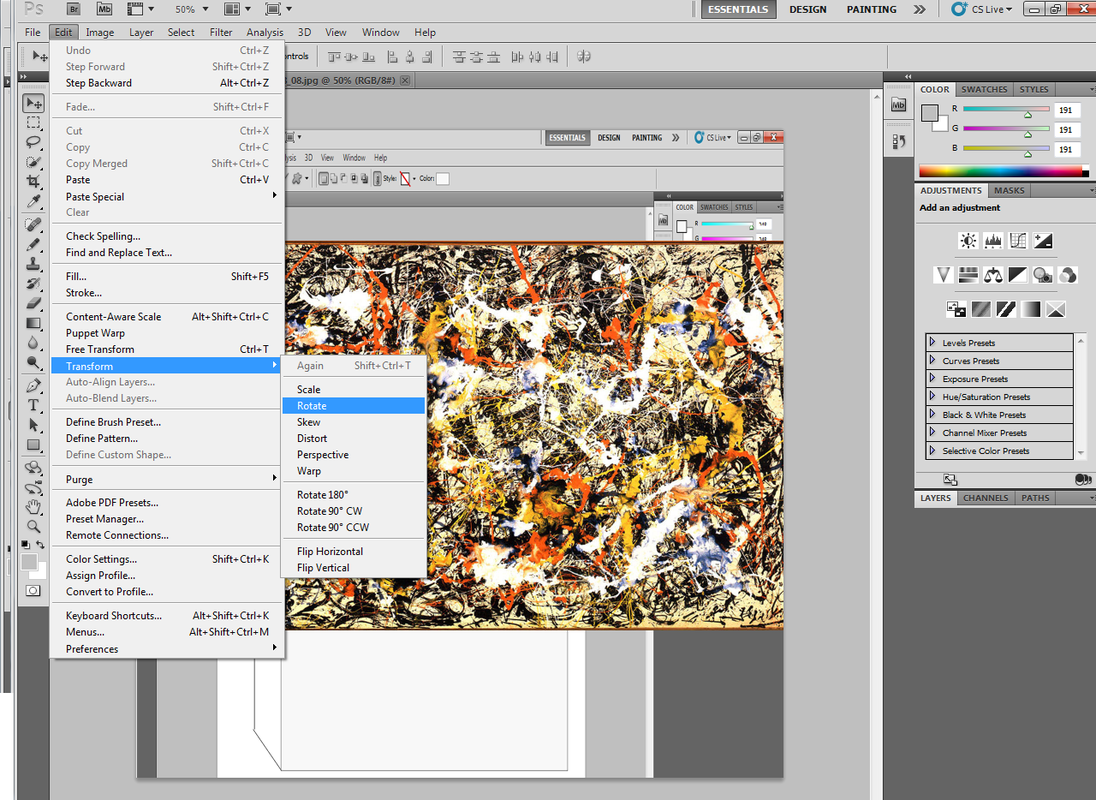
10. Click on the EDIT selection and scroll down to ROTATE image. Here you can move your image around to your desired position.
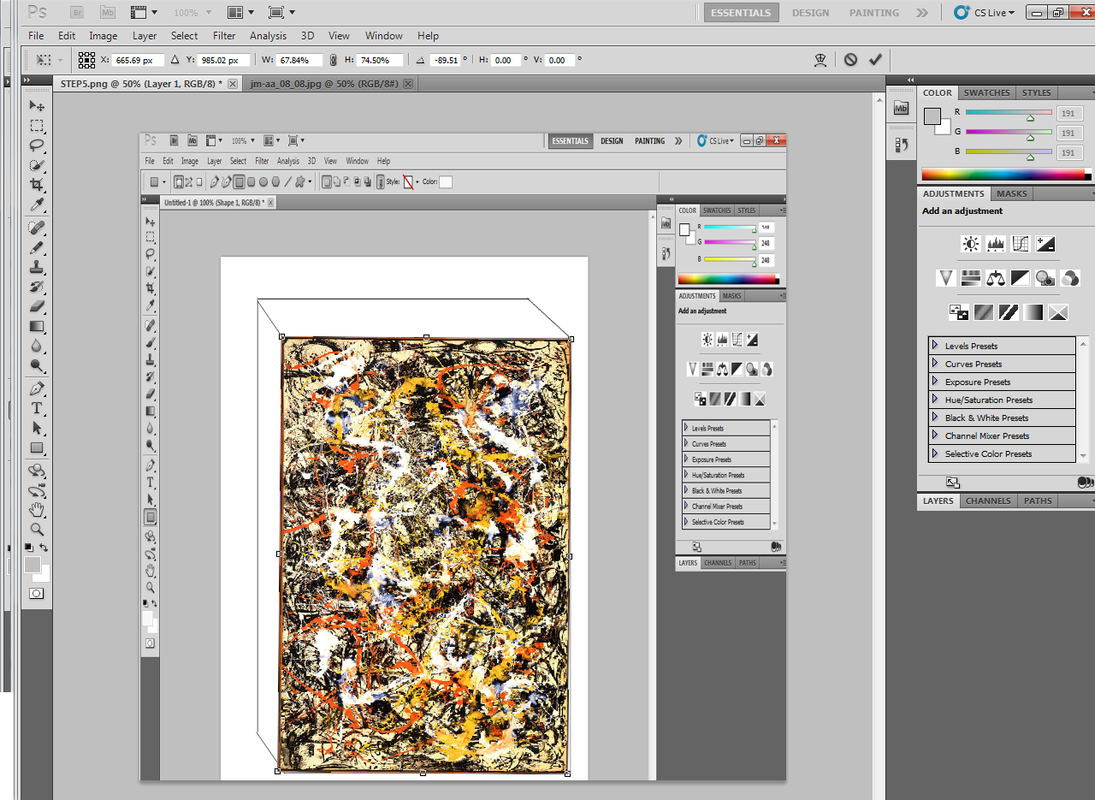
11. Click on the EDIT selection again and scroll down to FREE TRANSFORM. FREE TRANSFORM will allow you to re-size and re-fit your images.
Moving Around Layers Within Your Work:
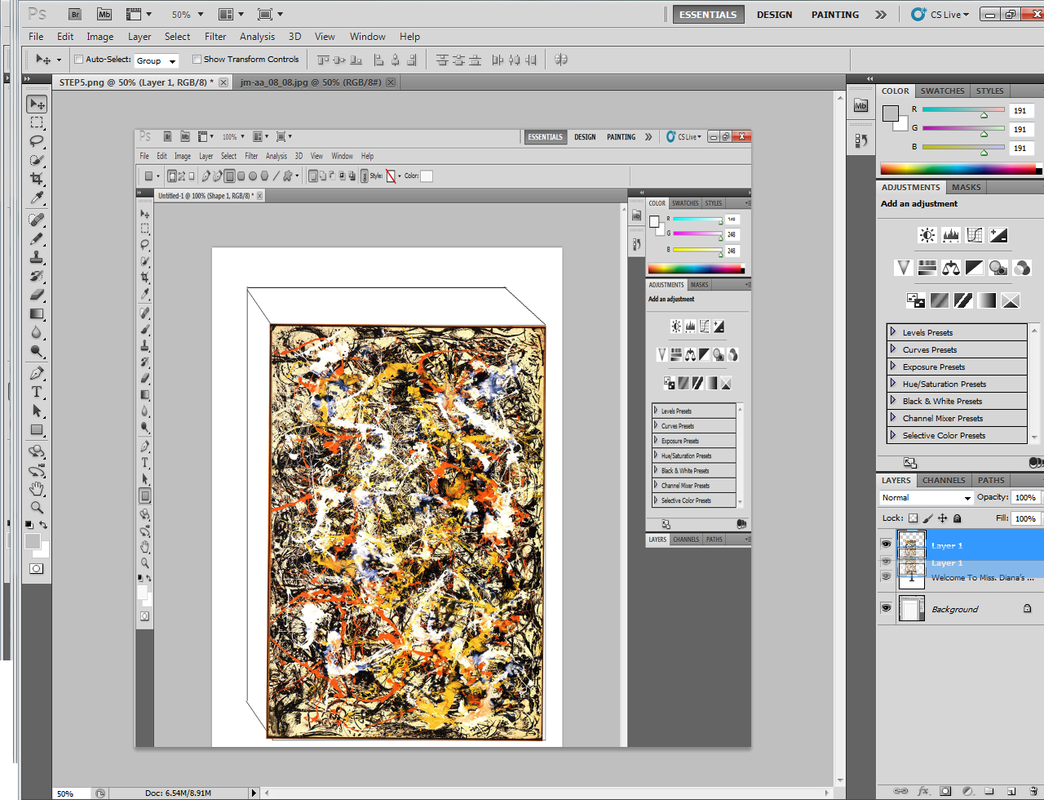
12. Using your tool box on the right hand side, you will be able to click and drag on the layers you would like to move within the piece. Simply drag and drop the layers where you want them to go. Delete the bits you no longer want and edit and transform your images to overlay one another
|
|

|
Another way to move your image, or trannsfer only specific parts of your image into your blank canvas is too:
In order to transfer your image to the canvas you can use the Magnetic Lasso Tool (3rd tool on the left from the top), in the toolbox on the left. You can either use the Magnetic Lasso, the Lasso or the Polygonal Lasso tool dependent on your preference, (right clip on the tool to change your options).
You will click the lasso tool onto the desired image, moving the mouse around the image clicking continually around the shape until you’ve surrounded the entirety of the image; once that is complete you DOUBLE CLICK you mouse.
To transfer the image over to the canvas now you select the move tool , (top right) then you will drag your image onto the canvas. BE SURE to click on the move tool, or your image will not transfer, you will just get a dotted shape.
If you would like to move your image to a selected area of your template, you simply click on the move tool again and
click and drag your image until it has reached your desired placement.
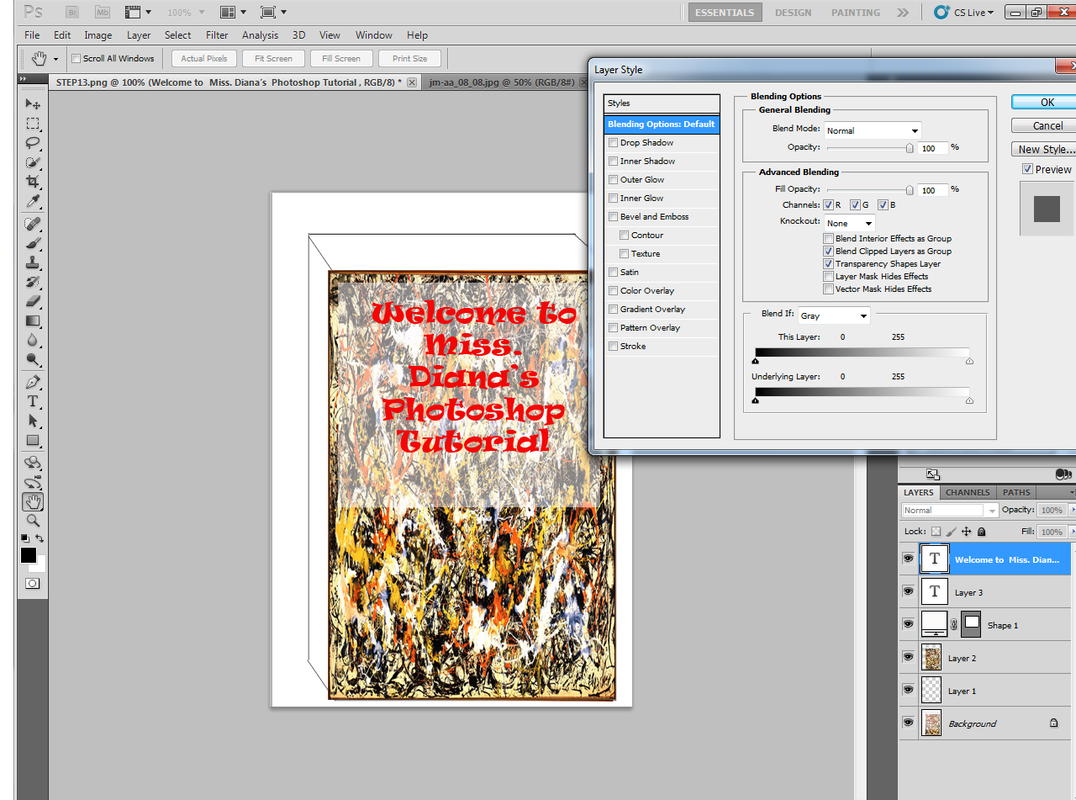
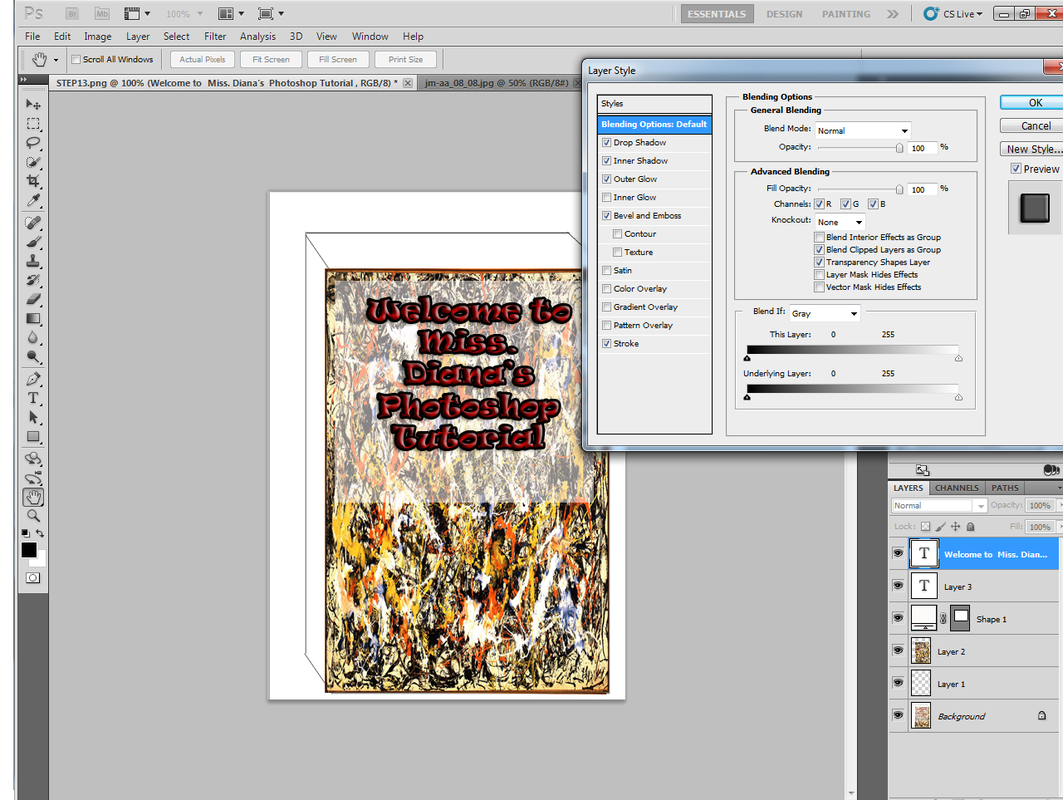
Re-editing Text, Adding Layers and Filters:
|
13. Double click on your Text box and change the components of your text, adding new techniques and styles, and changing the text to your desired font.
|
|
Overlaying Images:
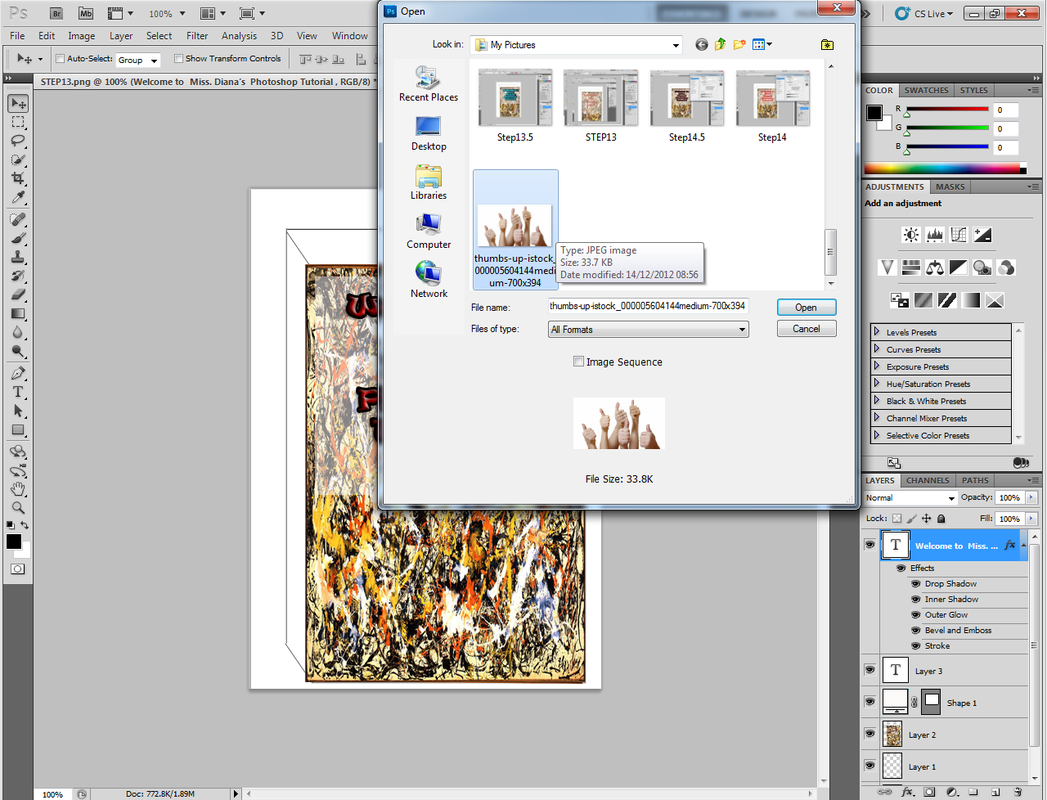
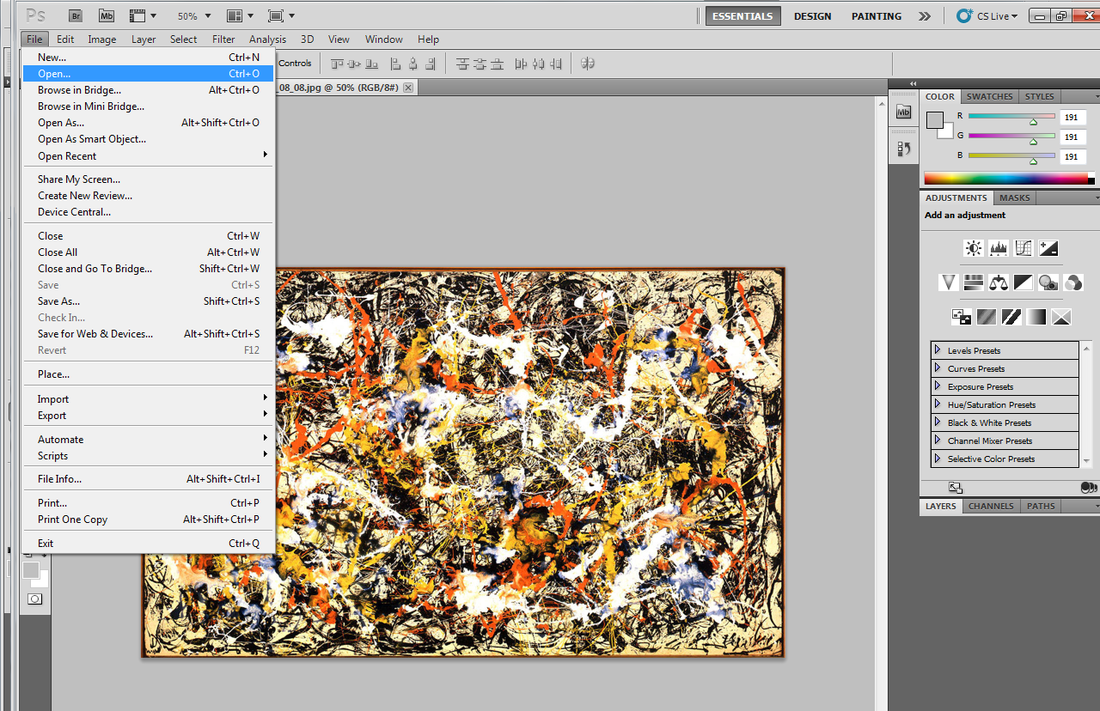
15. When adding various layers to overlay (or overlap) over one another, you must collect your images as you did in your first design. FILE, OPEN and select an image from "My Pictures".
16. Click on your MOVE tool in the selection box on the left hand side of your screen, and drag and drop your new image onto your already started project.
17. Similar to your first steps, click on EDIT, FREE TRANSFORM, and change the size of your new image to fit perfectly into the desired area of your page.
18. When you are finished, click on the layer you are working on in the right hand side selection box, and change the "opacity" to your desired amount to overlay your images together.

|

|
|
19. Click on your current layer, and slowly drag the layer down a step or two to your desired arrangement, so that your layers are given more depth.
|
|
Adding Filters and Professional Designs:
21. Click on FILTER at the top of your screen and take the time to experiment with the different styles and techniques you can layer on your work to make it look more professional. Choose one, and decide on your dimensions and other details that will better suit your work.
Adding New Layers and Photo Manipulations:
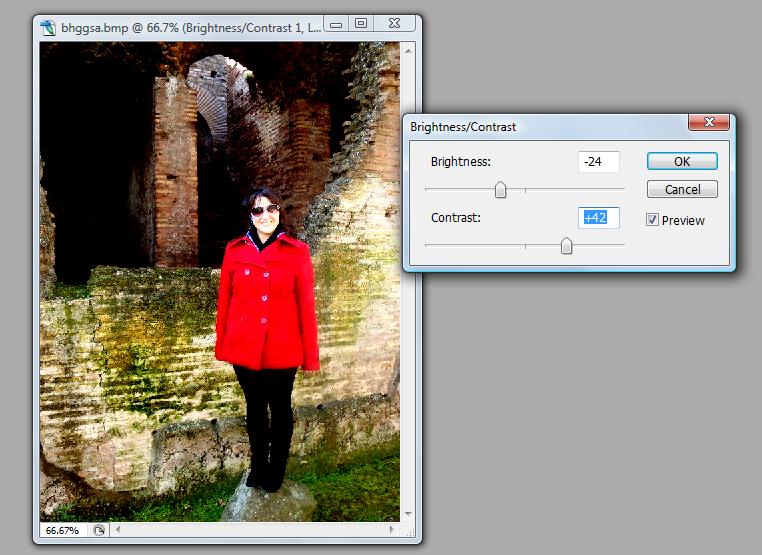
To layer, click at the top of your page, here you can scroll down to add a new layer, if you’d like to change the colour balance, brightness, contrast, hue, saturation, etc.. you will click on where these different categories will be displayed and you can click on your desired manipulation, and alter easily.
CURVES layer allows you to manipulate the colour palette of your image, (say if you want to use cooler tones), BRIGHTNESS and CONTRAST is probably one of my favourite manipulations, it can greatly alter the colouring and quality of your photograph. SELECTIVE COLOUR aids in your manipulations of specific colouring, similar to COLOUR BALANCE, these two tools can be fun to experiment and play around with. GRADIENT MAP, completely alters your image; making it black and white, ghost-like, negative photographic representation, etc…
Be careful when manipulating your images or templates that you are clicked onto the proper layer, or you will alter the entirety of your image. If you layer box at the right hand side isn’t popping up, you can use the tool at the left top of your tool box, and surround your desired image with a box, from there you will be able to manipulate that specific area.
Original Photograph: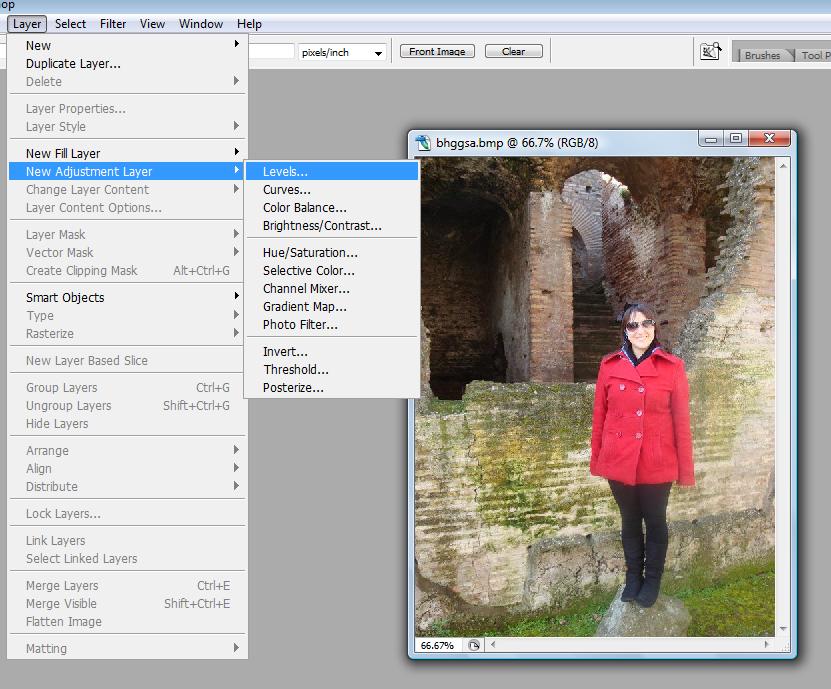
|
The most important thing I will stress about manipulating and editing your work in Photoshop is too always create a new layer after every major change you make, or as soon as possible. By doing this, it makes it much easier to delete what you don’t want or go back in to manipulate it to your liking. If you don’t add new layers, you will not be able to go back in and fix the little changes you’d like too.
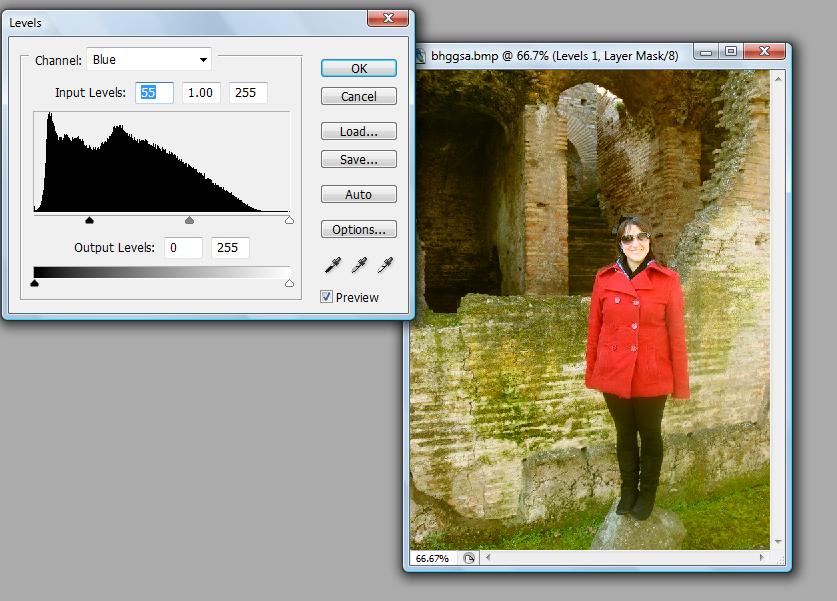
The following features are found within LAYERS at the top of your page, and allow you to create NEW ADJUSTMENT LAYERS. I will quickly be going through allow you to manipulate the colour temperature (warm/cool), bring out desired or specific colours and add contrast or saturation for more dramatic images. These features for me are probably the most used features when manipulating images, in fact they are constantly teaching you things as you can continually experiment with them. Levels
These features allow you to control the colour changes within your work or images on your own terms. This feature allows you to manipulate the temperature of your photos but also allows you to experiment with different dynamics creating more saturation, or duller images depending on your preference. |
|
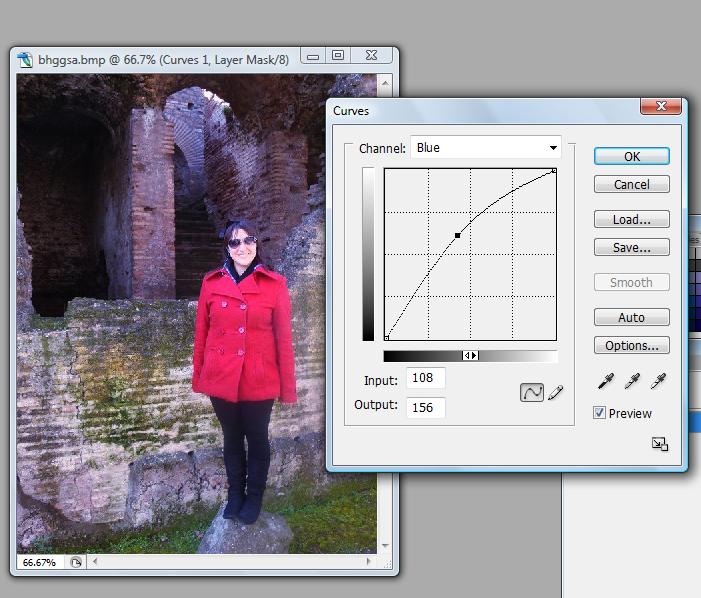
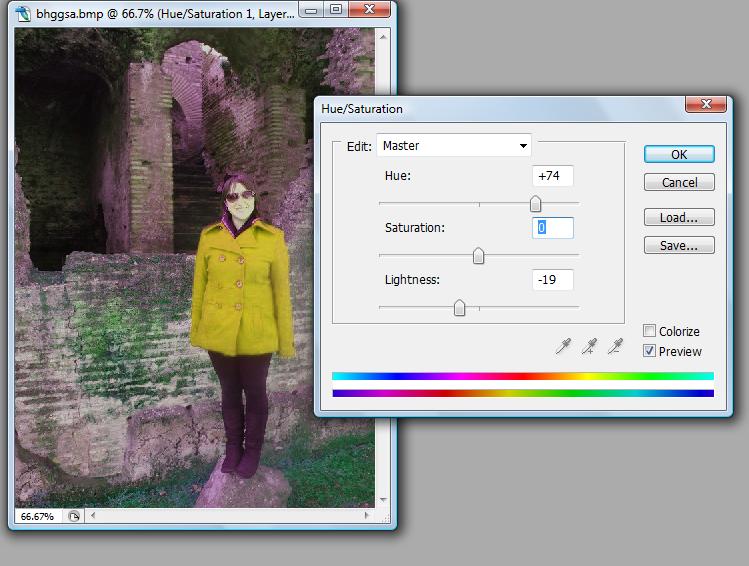
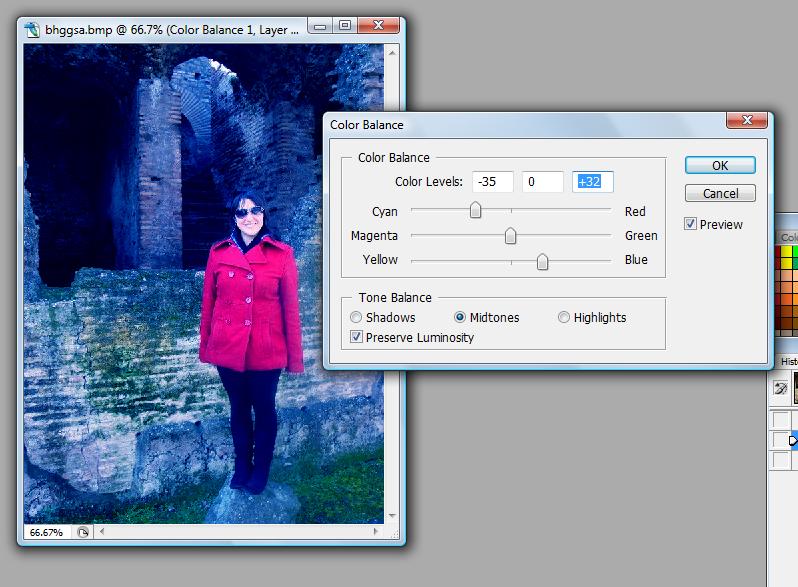
Curves Similar to LEVELS…. Experimenting within your work is the best way to achieve your desired result, this feature allows you to choose RGB, Red, Green or Blue colours in your images and change the temperature of the photo; for example you want to create a more solemn image with a colder feel. You would isolate BLUE, and adjust the curve of the level to your liking. Hue and Saturation This feature allows you to play around with the type of photo you’d want to create, for example if you wanted to create a more psychedelic image or themed image or alter the colours in your image completely, this is the perfect tool. For example I changed my red coat to yellow and cooled and dulled the temperature of the colours in the background to give the picture a completely different feel. Colour Balance Allows you to play around with the different colours in the colour wheel, so you are able to really alter the saturation and amount of specific colours you prefer in your image You can manipulate the midtones, shadows and highlights in your image; for example I wanted my image to stay saturated but to highlight the shadows (or background in blue) Brightness and Contrast Probably one of my favourite manipulation tools in Photoshop, I probably used Brightness and Contrast more then anything when I experiment in Photoshop or create images. This tool allows you to alter your image greatly with very small changes. For example I want to make this image really stand out, bright, saturated and colourful This feature allows you to play with the light and darkness of your image. |
